Crystal Key 2:The Far Realm
A.K.A
Evany Key To A Distant Land
by earthlight, Kheops Studio
Walkthrough by MaGtRo March, 2004
GamePlay: The Game installs using 2 CDs. The game plays with either CD1 or 2 on the CD drive. The main menu has new game, load, save, resume, options, credits and quit. The options menu has the sound volumes and subtitle choice. During gameplay, press ESC to access the main menu.
The blue cursor shows no action, while the green is the action cursor. The triangle is the back out cursor and the spiked cursor shows inventory or interact action possible.
Right click of the mouse brings the inventory bar at bottom of page. The inventory item clings to the cursor when selected. To see the inventory item in close view, click the item on the jewel on the left of the inventory bar. Click the yellow jewel to close the zoom in frame.
A map is available to get to locations by clicking on the location dot. Traveling through places can be done on a jetpack when the jetpack icon is seen at top right of game screen. To use the jetpack, right click to get inventory, select jetpack and click it on screen. A map will then be available for accessible locations.
To save a game, see an the empty slot, then click on the gold jewel at bottom left and click OK to save game. Saves can be written over. There are unlimited saves.
Press the spacebar to skip the intro, dialogues and cutscenes. Listen well because some ambient sounds give clues.
You are Call. See Evany, Call's world and hear about the entranced inhabitants after the time of Ozgar's Balial regime. Call's parents disappeared one day and left him alone.
A portal opens and a woman appears. She is taken by guards.
What is going on?
Evany: Look around at the empty street. Go forward to the inactive portal. Look down and pick up Athera's diary.
Athera's diary: Click the button at top left of the frame and read the log. While at the portal relay station, she found a crashed ship from the fourth quadrant of the Maradyne sector. She went to the museum and learned of Colonel Lifeson's heroic act. It was Lifeson's ship that she found. Her quest is to find a cause of the colonist's symptoms. Traveling to Maradyne Sector showed the population worse than the colonists. This support the theory that the Balial satellites caused the illness. Athera saw some of the Maradynes working a mine in their entranced state. She also learned of Call, a Lifeson family member, whose DNA might not have been affected by the Balial rays. Click the green button to turn off the diary.
After reading the diary, pick up the crystal key on the ground. Turn to the inactive portal and take the crystal key from inventory. Use the key on left active knob of the portal. The key automatically inserts and see the portal activated with a ship on the other side. Click on the portal to get to the ship.
Outpost: Look around and then talk to Naoo, Professor of Archeology and History from Yuito. Learn about Balial and Ozgar's oppression. This place is Geshon or Gorshenna. They will go to Meribah to look for Merari.
Search for the Merari in Meribah
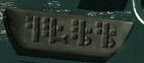
Spaceport Interior: Naoo's ship needs to be worked on. Look around and note the script on the transport cart. Go towards the other end of the platform 2xs. The lift goes down. Go to the elevator at end of this platform. Enter the elevator platform, turn around and click on the round up-down button at right base of the elevator wall. Press the up button so that we can check the Spaceport first.
Bar: Go forward and go through the door. Climb up, look around and exit through the other door to the balcony.
Balcony view scope: Look through the view scope, click the green icon on right frame to scroll forward and click on left frame to scroll back. See a view of a pond with a stone slab, tree tops above the clouds and a crashed ship. Move the icon to the backup mode to get out of the view scope screen. Pull back out of the view scope.
Enter the bar, go down the stairs and go to the elevator. Go down 2 floors to the sea level of the spaceport. Ride the boat by clicking on the seat. A map appears. Click on Market at right island.
Market: Climb up to the market and enter the first door on the right.
Spaceport Supply shop: Talk to the shopkeeper and find out that he sells supplies for the spaceport. The machine on the window is a jetpack that can be rented for 200 crits. He tells about an old Merari that lived way out in the desert a long time ago.
Exit the shop, turn right and forward 2xs. Turn right and forward to alley steps.
Tarq's stall: Go closer under the tent and see a bioportal delivery of gramdeers. Hear a 4 tones sound. Save game here for possible replay of the tones. The tones will be replayed every time you go under the tent.
Talk to Tarq, the fruit seller and learn about the bioportal, the spaceport built by the Merari and about Bok's portal. Bok, a nehli can be found in the monolith trees across the desert. Ah, this is the one we saw on the second scene of the view scope.
Talk to Cavan , the young boy. He wants you to play 'Merik the Warrior'. It doesn't matter if you win or lose. This is an informational game only.
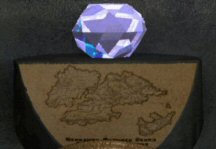
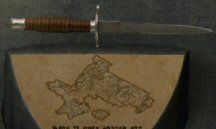
Merik the Warrior Game - Roll the dice, red moves one space, green - 2 spaces and white - 3 spaces. Click on the dice at top right and it will roll. The board has the gifts Merik the Warrior collected when he won battles - gem, knife, cup, helmet, lute and seal. The gifts are arranged on the board in the order acquired by Merik.
Go back to the bar at the spaceport.
Bar: Talk to Naoo. His side thrusters were stolen. The drinks are on him - just help yourself on the dispenser. Go to the middle of the bar, look down on the selection console. Click the gold button on the left side of the roll bar to cycle the selection. Click on any or all of the 3: the leaf (green), berry (red) and the water (clear) selection. You can drink as much as you want then take the empty tumbler. Go to the elevator and go down one floor to the spaceport level. Hear somebody say 'Help!'.
Acquire a jetpack
Injured man at Spaceport Interior:
Exit the elevator and turn right. Go forward to the crates and then turn left to see a man on the floor. Talk to him - he needs the medbot.
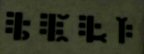
Go out of the building, forward twice on the ramp, turn right and see the medbot. Note the strange script on the medbot's chest similar to the transport cart. Click on the medbot's head. Talk to Dr. Jakar. He wants you to give a nanobot injection to the injured man. A syringe goes in inventory.
Go back to the injured man behind the crates. Take the syringe from inventory, right click to close the inventory bar and click the syringe on the injured man.
He wants you to look for his cargo box with orange stripe. Go down one floor to the sea level, exit the elevator and turn left. Take the cargo box. Go back to the injured man and click the cargo box on injured man.
He now wants you to take the cargo box to his brother at the market. Click the cargo box back in inventory bar. Go down to sea level, ride the boat and go back to the spaceport supply shop in the market.
Spaceport Supply Shop at Market: Enter the first door on the right and give the shopkeeper the cargo box. For helping Tabor, the shopkeeper lets Call to borrow a jetpack for free. The best place to launch the jetpack is at the Pad. Go back to the boat and click on Pad location on the map.
Launch Pad:
Turn right and exit the boat. Look down and left at the panel on a metal box. Look close, click on the lid to open the box and flip the lever to start the elevator power. Pull back to close the lid. Go forward and little to the right to go to the lift platform.
Turn left to another box on the railing. Open the lid and flip the lever to raise the lift. Exit the lift platform and see the jetpack at top right of screen. This means the jetpack can now be used. Right click to open the inventory bar, then left click the jetpack and click it on the screen. A map is seen.
Desert House:
This is the first scene we saw looking through the view scope outside the bar. Turn around to the stone slab. See a keyhole and a key hanging on the right side of the stone slab. Go the left side of the stone slab and see a crank inset.
Turn left, walk the path on the left side and see one end of the house with ferns and bromeliad looking plants. There is a grilled gate and a faucet missing a handle.
Go back to the path and go to the other house entrance. On the way, see pipes running at the bottom part of the house. Before entering the house, turn right and see a faucet.
Enter the house and immediately turn around to the left. Pick up the square key hanging on the hook. Look around the house. The next room has a door framed by flower-etched stones. Enter the next room and see windows framed by shutters, a small decor with a small faucet on the side and a wood door.
Go back outside towards the stone slab using the left path and see a manhole on the left. At the stone slab, insert the square key on the keyhole at right side of the stone slab. The latch swings open. Take the round key. Turn around and click forward once on the right path. Turn right and go to the manhole on the sand. Use the round key on keyhole.
Enter and go down automatically. It's too dark. We need light. Look up and click on sky to get out. Go close to the stone slab and use the jetpack.
Find light for manhole passage
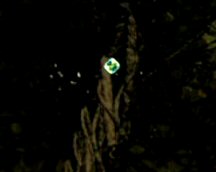
Nehli Bough:
Flute - elevator puzzle - Look up and see a platform hanging from the tree. Then look down and click on a flute on a stone shelf. The flute is seen close-up. Click on each hole and hear different tones. Remember the 4 tone sound heard whenever the bioportal delivers a fruit at Tarq's stall. Reproduce the sound on the flute. From left to right: press the # 3, 1, 2 and 4 hole. The elevator goes down.
Meet Bok - Enter the elevator and take a ride up the tree. There's a thriving place above the clouds. Go forward 3xs and turn right. Talk to Bok, the nelhi. Find out about Merik and the microbes that cover the lens and powers the bioport. The microbes that thrive in caves can be fed by cultivated algae and are kept away from too much sunlight.
Go back to the path, turn right, forward once and turn left. Take a cluster of koozberries from the bush surrounded by glowbugs. Hey, this glowbugs might serve as light for the manhole cave at the desert house. Click on the side of the screen to back out.
Nehli Interior:
Turn right and go forward to the split in the path. My, that is some giant tree trunk. Turn left, forward and see algae troughs on the right. Use the empty tumbler and get tumbler filled with algae.
Turn right, go forward to the other end of the path. Enter the wood door to the tunnels. Automatically move to the end of the passage. Turn left and click twice on the lift bucket. Go up and see a locked door.
Turn back to the bucket, look up and click on the vines overhead to go automatically to the opposite side of the cave wall. Turn around, go through the tunnel and exit to the outside.
Turn left while standing outside of the cave opening and take the empty wooden crate. Go to the end of the path, hear a crick crick sound and see a fire ring. Turn around and pick up the nut shell from the ground.
Go back to the cave and click on the overhead vine to go back to the other side. Click on the lift bucket to go back down.
Go through the light wood twig door to another bucket lift. This time, the bucket goes down. Go up the platform and hear a wheel turning. Pan left and click on wheel at left of platform. Hmmm.
Turn around, click on main wood path, turn right and forward to the dock.
Jakar Island:
Look down on the water under the broken dock. See a blue eel. Click on boat.
The boat ends on the dock of Dr. Jakar Island. Turn right and talk to the fishing nehli. Learn about the blue Tarru eel that has electrical shock, territorial and will attack one of their kind.
Go to the house and see that the call buttons looks familiar. Where did we see those script sbefore? Aha - the medbot and the transport cabs. We do not have enough data yet to progress here. Go back to the boat.
Nehli Interior:
Go through the tunnel, forward to the other side of the platform and forward to go outside. On the way take note of the lanterns. Look close at lantern on right side just before the steps to go down. It is full of glowbugs with berry stems at the base. Aha - fancy way of lighting a dark area. Hint, hint...
Outside, go to the end of the path and click on a giant nehli leaf at river's edge. The leaf trip ends at Kahleena's house.
Kahleena's house:
Take the empty spray bottle from the dock. Go up the path and talk to Kahleena standing left of the gate. Learn about nehli trees that resulted from the war. The gift of water is given to Merik. The fountain might be the hovering doorway where the water comes forth from mid-air. The Merari might have sought refuge high on mountain or under the sea. Go towards the house and see a cauldron in front of the house. Go back by the river and take the jetpack to go to Roy's Crash.
Roy's Crash:
Turn around and go left of crashed ship. See Roy fixing the space ship beside a toolbox and a wrench on the sand. Talk to Roy. He warns you of the jaggle, a lizard - 'it will knock you out even if you get it on your skin'. Roy needs a fuel combiner for his ship. Isn't that the shipment that the spaceport supply store at the market just got. Turn right and forward once. Use the jetpack to go to the spaceport.
Pad: Turn around and go to the elevator platform. Use the lever in the box by the rail to go down. Go to the boat and click on chair. Click on spaceport on the map.
Bar: Take the elevator to the bar by going up 2 levels.
Look close at drink dispenser at middle of bar. Click on gold knob of the roll bar and cycle the selection to the berry drink. Click on berry selection. Take the empty spray bottle from inventory and click it on the tumbler filled with koozberry juice to get spray bottle with koozberry juice.
Nehli bough: Go back to Nehli bough by going back down to the sea level via the elevator, take the boat to the pad, go up to the second level of the pad and use the jetpack.
Collect glowbugs - Go to Nehli's area and use the flute by clicking on the 3rd, 1st, 2nd, 4th hole. Take the elevator, go forward 4xs and turn left to the koozberry bush surrounded with glowbugs. In inventory, click on koozberries and then click it on the crate to get wooden crate full of berries. Take the wooden crate full of berries and click it on the glowbugs to get wooden crate full of berries and glowbugs. Click on side of screen to back out.
Turn left and forward once. Turn left and go to Bok. Show him the nut shell from inventory. He identified it as a kracklenut shell loved by yamax. Go back to the elevator and ride down. Use the jetpack to go to the desert house.
Desert House Dry: Turn right and go forward once. Go down the manhole.
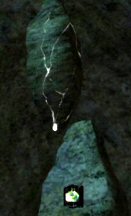
Get light on manhole area - Look down and place the wooden crate full of berries and glowbugs on the lit area of the floor. Look up, use the spray bottle with koozberry juice on the dark passage. Watch the glow bugs fly out of the crate and cling to the wall of the passage.
Go forward and click on the wheel of the door at end of passage. Turn the wheel on the large pipe. Hear water flowing. Turn right and click on round area on the wall. See water flowing in a cavern. Turn left and take crank device from top of the pipe.
Go back to end of passage, look up and click on sky to exit manhole. Go to left side of stone slab. Use the crank device on pentagonal crank inset. See water flow down the stone slab and fill the pool. Flowers bloom and plants thrive around the pool.
Flower picking time - Turn left from the stone slab and take the blue flower beside the pool. Go forward once and turn right and take the red flower. Go down the path and pick up the white flower by the wall of the house close to a dripping pipe. Turn right and go forward 2xs. Turn around and pick up the pink flower close to the tree.
Go to the house and before entering turn right to see the faucet. Click on faucet and pick up the purple flower. Enter the house and go to the next room.
Enter the room on the right. Face the small fountain on the wall shelf. Click on the faucet on the side to start water flowing. Take the dark red flower. You should close the windows in this room at this time
Go to next room and face the arched entryway. Click the flowers on the corresponding etched stones. The flowers will cling to the stone. We're missing the flower on the top stone.
Find the last flower:
Roy's crash: Click on the wrench beside the toolbox and Roy will let you borrow it. Go back to the desert house.
Desert House: Go to the left side of the house and look close at the faucet without a handle. Use the wrench on the faucet. Watch the water revive the vine, ferns and flowers. Pick up the yellow flower.
Enter the house through the right side and go to the arched entryway. Click the yellow flower on top etched stone. The slab goes down. Enter, turn right and take the empty vase on the shelf.
Subway and cliff: Go to the manhole cover at other side of the room. Click the manhole cover and go down. Go to end of the tunnel, through the ornate door and outside to the beach.
Fix the fishbot
Fishbot Beach:
Go to the water edge and see a fishbot. Click on water and turn around to see the other side of the boat. The boat looks 'dead on the water'. Hmm how can we jumpstart this boat. Look around and see the Tarru eel swimming around. Hmmmm.... What did the fishing nehli say about the Tarru eels? Click on the square panel to get rusty metal plate. Go back to the beach, use the jetpack and select the Nelhi location.
Nehli Interior:
Make a mirror - Exit the elevator and go forward until the split in the path. Go right and through the door. Enter the twig door on the right and go down the bucket. Go up the platform, pan a little to the left and go forward to the turning wheel. Use the rusty metal plate on the turning wheel to get a shiny metal plate. Go back to the fishbot beach by going back up the bucket, turn left, go out through the tunnel, forward and left to the path until the elevator. Go down and use the jetpack to go to Fishbot beach.

Fishbot beach:
Make use of the Tarru eel - Go to the fishbot, click on water and turn around. Use the shiny metal plate on the small opening on the left. Watch the Tarru eel shock-zap the fishbot. Remember what the nehli said about territorial Tarru eels - He thought his mirror image is another eel, eh. Thanks, Tarru eel for jumpstarting the fishbot. Click on the red bar on the right.
Aboard the fishbot, look up and see a third call button code. Look down and pull up the gray lever to start the fishbot. Enjoy the ride underwater.
Save Athera
Merari Palace: Talk to Getri, a Merari and learn about the old war, Meriba, Balial, the illness and other important information.
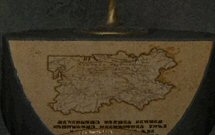
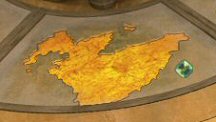
After talking to Getri, turn around, go forward and up the stairs. Go to the hallway planked by blue walls. To the right is a room, showing Merik's gifts and a central pillar surrounded at the base by maps. Exit room, turn around and enter the left door.
Talk to Folkrin at the portal room. Learn about Athera and the bioportal. See Evany on the portal. Talk to Folkrin again to get through the portal. Turn left to the portal and click on it.
Prison:
After passing through the portal, turn left and go through the entryway. Turn right to the cell and talk to Athera. A guard comes. Watch the guard touch the handplate on the cell door lock. Talk to Athera again and learn more about Evany and the prisoner processing. Time to think of a way to get Athera out of here. Look around the area and see nothing to help. Aha - the handprint..... Go through the portal again.
Merari Palace: Go out of the portal room and down the steps to the fishbot. Automatically reach the Fishbot Beach. Use the jetpack to go to Desert House.
Desert House: Take the left path to the grilled gate side of the house and see a jaggle (remember what Roy said...) run away to the back of the house. Enter the house through the kitchen area. See the jaggle again at the other room. Follow the jaggle to the room with the small decor. If the windows are already closed, see the jaggle exit the room through the hole on the floor. (If the windows are open, the jaggle goes out through the window. Close the windows, then go back and shoo the jaggle away from the left end of the house. Start from the begining of this paragraph.)
Now, how do we catch the jaggle? We don't! Go back out to the grilled door at other side of the house and see the jaggle trying to get out (careful, remember it will knock one out by skin touch only). Take the empty vase from inventory and click it on the jaggle to get vase filled with venom. Go back to the fishbot and ride to the Merari Palace.
Merari Palace: Go up to the portal room and enter the portal to go to the prison.
Prison: Click the vase filled with venom on the handplate of Athera's cell. Watch the guard gets poisoned when he touched the handpad. Click on Athera's cell grill. Watch Call take Athera back to the palace.
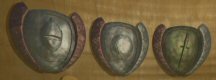
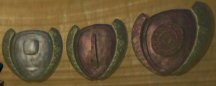
Merari Palace: Athera is given Merik's healing water. She wakes up. Talk to Athera. Learn about the Balial conditioning process. Look at the walls of the room and see the 6 shields showing Merik gifts. Note the different colors of each shield.
 |
 |
Save the world
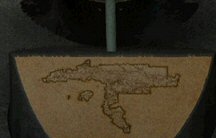
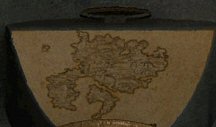
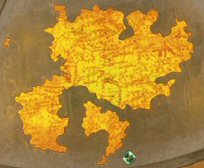
Merik Gifts' Room: Note the 6 stands that have Merik's gifts by the walls of the room. At the center is a pillar with 6 maps on the base.
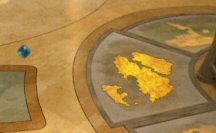
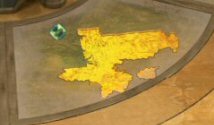
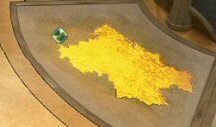
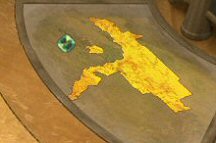
Gifts and Map puzzle - The object of the puzzle is to get the correct code for each gift stand that will show the map of the world that gave the gift. Then to light up the map at the base of the central pillar in the correct sequence.
The code for each gift is shown by the gifts' shield in Athera's room. The colors on the shield are red, green and white. The numbers associated with these colors are mentioned by Cavan, son of the fruit seller in the market during the Merik the Warrior game: red is one, green is two and white is three.
The correct sequence of the highlighting of the maps is also mentioned by Cavan - gem, knife, cup, helmet, lute and seal.
Gifts in sequence Shield colors (L-R) Code based on game dice 1. Gem red, white, white 1 3 3 2. Knife red, green, white 1 2 3 3. Cup green, white, green 2 3 2 4. Helmet red, white, red 1 3 1 5. Lute green, red green 2 1 2 6. Seal red, red, green 1 1 2 Solution:
1. Gem: Go to Gem stand. Press the left button once, middle button 3xs, right button 3xs. Look at stand map and click the corresponding map on the floor.
2. Knife: Go to knife stand. Press the left button once, middle button 2xs, right button 3xs. Look at stand map and click the corresponding map on the floor.
3. Cup: Go to cup stand. Press the left button 2xs, middle button 3xs, right button 2xs. Look at stand map and click the corresponding map on the floor.
4. Helmet: Go to helmet stand. Press the left button once, middle button 3xs, right button once. Look at stand map and click the corresponding map on the floor.
5. Lute: Go to Lute stand. Press the left button 2xs, middle button once, right button 2xs. Look at stand map and click the corresponding map on the floor.
 |
 |
6. Seal: Go to seal stand. Press the left button once, middle button once, right button 2xs. Look at stand map and click the corresponding map on the floor.
 |
 |
When the maps on the floor are correctly pressed in sequence, the pillar door opens to show a ladder.
Merari Cave:
Go up the ladder of the now open column. Click forward, pan right, forward. Pan left, forward. Pan right, forward and down the steps.
Turn left and look through the middle porthole. It is the desert house's manhole area.
Turn around and go down the stairs. Click on Merik's healing waters. Watch the Ruler talk to Call - Go to Putak the nehli and at his touch the gift will be given to you.
Pan left of the water column and go forward.
Enter the cave, go forward 8xs, pan right, forward, pan right, forward, forward, pan left to the dripping bacteria. Take the tumbler filled with algae and click it on the dripping bacteria to get tumbler filled with algae and bacteria.
Go back by panning left and forward 4xs, forward 7xs and reach the flowing waters.
Climb the steps on the other side of the cavern, forward to the cave, pan left, forward, pan right, forward to intricate doorway, pan left and go to the ladder. Click to go down.
Desert House: Go to the Desert house via the fishbot and jetpack.
Go to the left side of the stone slab and use the crank device on the crank inset. This stops the flow of water and the pool drains leaving sand.
Go to the other side of the pool close to the right end of the house. Face the pool and click the tumbler filled with algae and bacteria on the empty pool. It produces a portal. Click on the dry pool portal
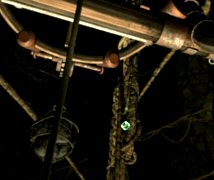
Causeway: Arrive at the Causeway, turn around , go forward, turn left, look down at the water's edge and see a small vine.
Turn around, forward to the manhole with a lever beside it. Pull the lever to open the manhole cover. Climb the steps and turn right to go to the manhole. Enter the manhole.
Pod: Go forward to the railing and look down. Click the tumbler filled with algae and bacteria on the floor below. Watch as a portal is made.
Turn right to panel on wall. Pull the right lever. The left lever that opens the hatch overhead the pod portal is stuck.
Turn around and enter the door to the control room. Click on the star graph panel on the right. The Evany world is selected.
Exit the room and look at the pod portal. It is now a portal to the Evany world.
Exit causeway through portal to Desert House.
Desert House: Go to the left side of the stone slab and use the crank device on the crank inset. This starts the flow of water and the healing water goes through the portal to the causeway.
Causeway: Go back to causeway by clicking on the portal from the other side of the pool.
Go to the vine by waters edge and take the small machine. See the healing water flow to the water that is above the manhole pod.
Go through the portal again and use jetpack to Nehli area.
Nehli Bough: Use the flute by pressing the 3 1 2 4 holes. Ride the elevator. Exit and go forward 3xs, turn right and talk to Bok about Putak. Putak lives on the First Tree and can be reached by yamax that loves kracklenuts.
Go back to main path, turn right, forward to the end of path, turn right through the mine door and right through twig door and down to the platform. Take the left branch and out to ride the boat.
Dr. Jakar's island: Go to the door and use the codes we have collected throughout the game.
|
|
 |
 |
||
| Transport vehicle | Medbot | Fishbot |
First door - use the code taken from the Transport vehicle. Press buttons (top to bottom and left to right) - 5 5 7 1. Enter and proceed to next door.
Second door - click on panel to access the code box. Press buttons (top to bottom and left to right) - 1 7 6 4. Rise up to next level and go through the doorway to the next door.
Third door - click on panel on the right wall. Press buttons (top to bottom and left to right) - 6 9 7 10. The bridge rises. Go to door and enter the Jakar's house.
Dr. Jakar's House:
Look around and see the house full of artifacts. Go down the stairs to the lower level. Talk twice to Dr. Jakar in his laboratory. Learn about the special water and its healing powers. Give the doctor the small machine and he gives Call crits (money).
Exit the island and reach the nehli's area. Ride the bucket up, left to tunnel and exit to flute-elevator area to access the flybot.
Spaceport: Ride down and take the boat to Market area.
Market: Go to the spaceport supply store. Give the money to the seller, turn around and pick up the fuel combiner on top shelf. Go back to boat, pad, ride the jetpack back to Roy's crash.
Roy's Crash: Give Roy the fuel combiner. Click kraklenut shell on Roy and he gives kraklenuts tin.
Kahleena's house: Place kracklenut tin in the cauldron. Finally found a use for this cauldron. Take the cooked kracklenuts tin from the cauldron.
Nehli: Bring down (3124) and ride the elevator to top. Go forward to end of path and right to the mine door. Ride the bucket left of the twig door. Ride up and turn around. Click on overhead vines to get to the other side. Turn around and go through the tunnel.
Go forward to the firepit. Place the cooked kraklenuts tin on firepit. See a yamax (giant squirrel) eat some cooked kraklenuts. Click on yamax and take a ride on treetops.
Putak:
Talk to Putak. Putak touched Call's forehead to receive the Ruler's Gift. Talk to Putak again - Your eyes will see evil but evil will not see you. Look around and see the place and some purple peppers.
Nehli: Ride the yamax again. Go back through the tunnel, click on overhead vine to get to the other side, ride down the bucket and exit the tunnel. Go down to the flute area to access the flybot.
Fishbot Beach: Ride the fishbot to the Merari palace.
Merari Palace: Go to Athera's room on the third level. Go to side of the bed and look up on the wall. See a bug on the wall. Try to take it.
Go to the Portal room, left door on second floor. Talk to Folkrin.
Prison: Go through portal. Go to left hallway twice, turn right and go forward until the elevator. Ride up, turn around by grilled wall, look down and pick up the empty cage. Go down the elevator, go forward until the portal. and go through portal.
Merari Palace: Go to Athera's room on third level and use the empty cage on the bug on the wall to get soulbug in cage. Gotcha!!!
Go to and ride the fishbot. Use the jetpack to go to Desert House. At Desert House, go through the pond portal. At Causeway, go down the manhole to the pod.
Pod: Hang the soulbug in cage on the left lever of the panel on the right wall. A ?vine comes up and wraps around the soulbug.
Watch as the healing water that flowed from the stone slab at Desert House through the portal flows down from the roof and spreads its healing powers to the world of Evany through the portal at the Pod. Athera and Getri thank Call for saving Evany and other worlds.
The End
This document may not be distributed without express written permission of the author and the content may not be altered in any way.
For Questions or Comments on this Walkthrough,
Please write to: MaGtRoCopyright © 3/2004
©GameSolves
http://members.brabant.chello.nl/~h.vangompel/
Forum
http://gamesolves.proboards23.com/